Essentials of Universal Scene Description (USD) for 3D graphics
This guide introduces the essentials of Universal Scene Description (USD) for 3D graphics. You'll learn about file structure, scene graphs, mesh data, materials, and how to create and manipulate USD files using Python.
1. USDA File Structure and Prims
USD files are organized as a hierarchy of "prims" (primitives), which can be transforms, meshes, scopes, materials, etc. Here's a minimal USDA file example:
#usda 1.0
(
    defaultPrim = "MyScene"
    upAxis = "Y"
)

def Xform "simpleMesh" (
    kind = "component"
)
{
    def Mesh "cube"
    {
        point3f[] points = [(0,0,0), (1,0,0), (1,1,0), (0,1,0)]
        normal3f[] normals = [(0,0,1)](
            interpolation = "uniform"
        )
    }
}
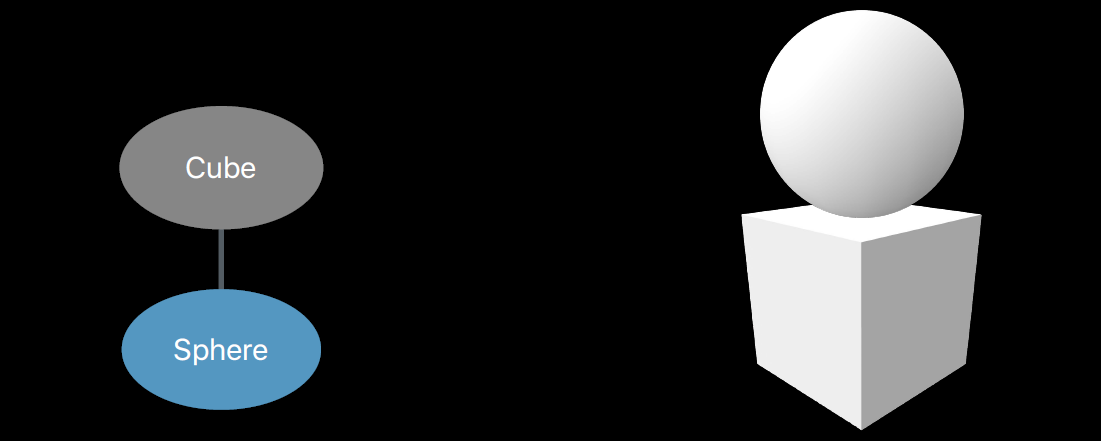
2. Scene Graphs and Hierarchy
A scene graph defines the object hierarchy and relationships in a 3D scene. Transforms on a parent affect all its child prims. Example:
def Xform "Parent"
{
    def Cube "Cube"
    {

    }
    def Sphere "Sphere"
    {

    }

    def Scope "Materials"
    {
        def Material "Glass"
        {

        }
    }
}
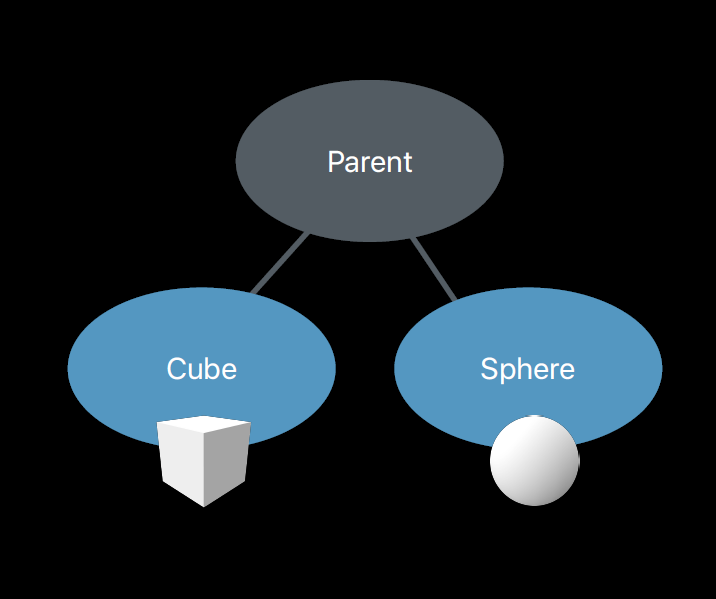
The hierarchy allows for organized, modular scenes and easy asset management.
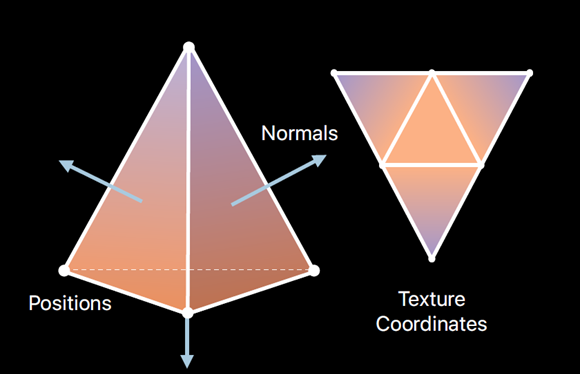
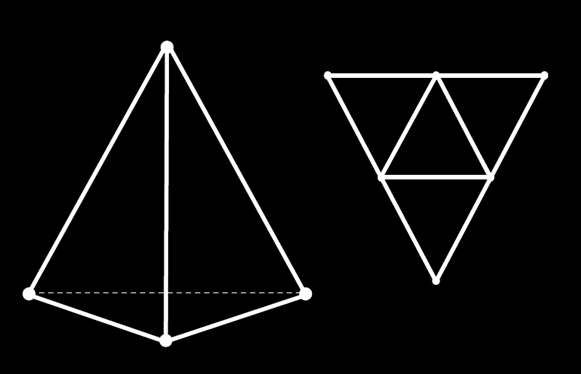
3. Mesh Data: Topology and Attributes
Meshes are defined by their points (vertices), face connectivity, and attributes like normals, primvars and texture coordinates (UV's). Example:
#usda 1.0
(
    defaultPrim = "Tetrahedron"
)

def Mesh "Tetrahedron"
{
    points3f[] points = [(-1,-1,-1), (1,-1,-1), (-1,1,-1), (1,1,1)]
    int[] faceVertexCounts = [3, 3, 3, 3]
    int[] faceVertexIndices = [1,2,0 3,2,1 3,0,2 3,1,0]
    normals3f[] normals = [(-0.58, -0.58, -0.58), (0.58,0.58,-0.58), (0.58,-0.58,0.58), (-0.58,0.58,0.58)](
        interpolation = "uniform"
    )
    float2[] primvars:st = [(0.75,0.43), (0.5,0.87), (0.25,0.43), (1,0.87), (0,0.87),(0.5,0.5)](
        interpolation = "faceVarying"
    )
    int[] primvars:st:indices = [0,1,2, 3,1,0, 4,2,1, 5,0,2]
    uniform token subdivisionScheme = "none"
}
4. Materials and Shading
USD supports physically based materials using schemas like UsdPreviewSurface. You can define material properties such as diffuse color, metallic, and roughness, and connect textures for realistic rendering.
Example:
def Material "MyMaterial"
{
    def Shader "pbr"
    {
        uniform token info:id = "UsdPreviewSurface"
        color3f diffuseColor = (1, 1, 1) # White
        float input:metallic = 1 # metallic
        float input:roughness = 0 # no roughness
        token output:surface
    }
    token outputs:surface.connect = </MyMaterial/pbr.outputs:surface>
}
5. Python Example: Creating a Mesh with Primvars
This example shows how to create a tetrahedron cell, set topology, normals, and face-varying UVs (primvars) using the USD Python API.
```python
from pxr import Usd, UsdGeom, Gf, Vt, Sdf, Tf

# 1) Create the stage and our Mesh prim
stage = Usd.Stage.CreateNew("sample.usda")
mesh  = UsdGeom.Mesh.Define(stage, "/Tetrahedron")

# (Optional) make it the defaultPrim
stage.SetDefaultPrim(mesh.GetPrim())

# 2) Set the point positions
mesh.GetPointsAttr().Set(Vt.Vec3fArray([
    Gf.Vec3f(-1, -1, -1),
    Gf.Vec3f( 1, -1, -1),
    Gf.Vec3f(-1,  1, -1),
    Gf.Vec3f( 1,  1,  1),
]))

# 3) Set the face‐vertex counts & indices (topology)
mesh.GetFaceVertexCountsAttr().Set(Vt.IntArray([3,3,3,3]))
mesh.GetFaceVertexIndicesAttr().Set(Vt.IntArray([
    1,2,0,
    3,2,1,
    3,0,2,
    3,1,0
]))

# 4) Turn off subdivision
mesh.GetSubdivisionSchemeAttr().Set(UsdGeom.Tokens.none)

# 5) Set per‐face (uniform) normals
mesh.GetNormalsAttr().Set(Vt.Vec3fArray([
    Gf.Vec3f(-0.58, -0.58, -0.58),
    Gf.Vec3f( 0.58,  0.58, -0.58),
    Gf.Vec3f( 0.58, -0.58,  0.58),
    Gf.Vec3f(-0.58,  0.58,  0.58),
]))
mesh.SetNormalsInterpolation(UsdGeom.Tokens.uniform)

# 6) Manually create the face‐varying "st" primvar and its indices
prim = mesh.GetPrim()

# Create primvars:st by passing ["primvars","st"] as the name
st_attr = prim.CreateAttribute(
    ["primvars","st"],                     # this set an attribute named "primvars:st"
    Sdf.ValueTypeNames.Float2Array         # typeName
)
st_attr.Set(Vt.Vec2fArray([
    Gf.Vec2f(0.75, 0.43),
    Gf.Vec2f(0.5,  0.87),
    Gf.Vec2f(0.25, 0.43),
    Gf.Vec2f(1.0,  0.87),
    Gf.Vec2f(0.0,  0.87),
    Gf.Vec2f(0.5,  0.5),
]))
# Attach the interpolation metadata
st_attr.SetMetadata("interpolation", UsdGeom.Tokens.faceVarying)

# st:indices
idx_attr = prim.CreateAttribute(
    ["primvars","st","indices"],
    Sdf.ValueTypeNames.IntArray
)
idx_attr.Set(Vt.IntArray([
    0,1,2,
    3,1,0,
    4,2,1,
    5,0,2
]))

# 7) Save out the USD‐ASCII file
stage.GetRootLayer().Save()
