We have a treat for you on this Script Tip Friday! Enrico Bedogni, an R&D Simulation Engineer at Meta System SpA, reached out with a tip that goes above and beyond. He shares his 4-step process to go from ODB++ To Modal Analysis. Thanks so much Enrico, amazing work!
Overview
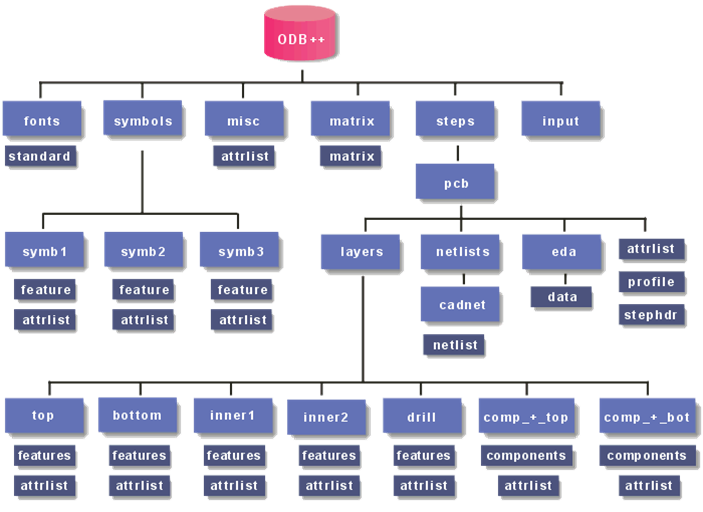
This work comes out from a deep study of the ODB++ file framework (PCB exchange file), this file is an ordered collection of folders/subfolders and text files.
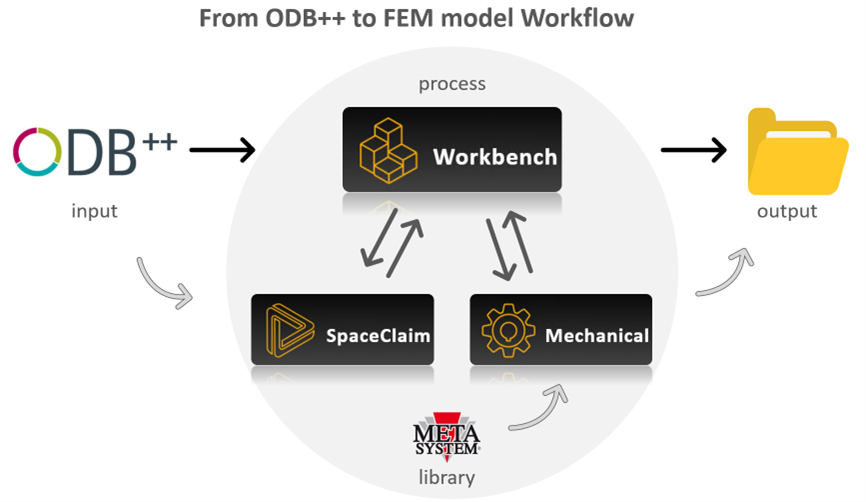
The main target is to automatically generate a simplify modal analysis of a PCB starting from the ODB++ to get quick results in the early design stages. The image below describes the full workflow. Ideally, the input file is the only ODB++ but in this first draft we also use an external library to add some extra information.
How to Start scripting – official documentations
Before I show you the script step by step, I’d like to share with you the resources that I found most useful. Workbench and Mechanical are well documented with great guides full of examples and pre-written code to use:
- Workbench_Scripting_Guide.pdf downloadable from ansyshelp.ansys.com in the Customization Suite section
- Ansys_Scripting_in_Mechanical_Guide.pdf downloadable from ansyshelp.ansys.com in the Mechanical Application section
I’ve found a Developers Guide.pdf that gives a good overview of the SpaceClaim API and its fundamental concepts in the installation folder (e.g. C:\Program Files\ANSYS Inc\v222\scdm\SpaceClaim.Api.V23). Then, for those who have access to Ansys Learning Hub (ALH), I suggest to look for the course Scripting in Ansys SpaceClaim. In this course, many topics are covered like objects, selections, named selections, feature operations and parameters.
In the end, YouTube is always a good way to go, here the best to me:
- Ansys Spaceclaim: https://www.youtube.com/watch?v=U98qtKWUoL8&list=LL&index=10&t=2077s
- Ansys Mechanical: https://www.youtube.com/watch?v=Q0MpwVSiFGs&list=LL&index=11
Workbench script – How to
In this post I’m going to focus on the Workbench script only, because I want to highlight its capability. The whole workflow is managed by the workbench script that, during its execution, recalls two other scripts. This is amazing because one can script on single products and take care of the details (like SPCM and Mechanical) and then glue up all together to automate in just one script. Here just an overview on the scripting interface:
-
Record Journal: it’s a step-by-step recorder of the python functions that you are calling while you are clicking in the workbench. It’s a very useful tool to get a quick start, then, when things get more complicated, it needs a bit of postprocess.
-
Run script File: it’s a loader, you can re-call saved script and workbench automatically performs all the sequences of commands inside the script.
-
Open Command Window: It’s a live console, you can try functions and see how they perform, live. I found it very useful to check and debug.
The script step by step:
At the script level, the approach is quite similar when you use the interface; you must first get a System and then reach all the green checks in order to get the results. Below I’ve associated the code to what it is done usually using the interface.
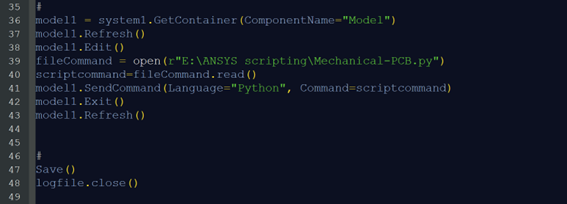
I want to highlight two commands at line 30 and line 41 in particular, they allowed to run the SPCM script and Mechanical script.
Even if they do the same things, they work a bit different. SPCM only needs the path of the script file, while Mechanical needs to read the file as txt then send it to interpreter with ad hoc command (see in the script).
Overview of what they do:
SPCM script:
- PCB profile geometry creation
- Fixing points creation
- Components creation
- Groupping and Namedselactions
- ready to Mechanical
Mechanical script:
- Reading components’ spec from external library
- Material and geometries definition
- Concentrated masses creation
- BCs setting
- Meshing and solving
- Results
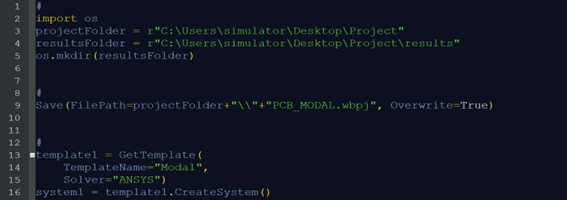
System creation
Lines 2 to 5 – Definition of the project folder (line 3) and creation of a result folder (line 4 and 5) where to store the final results (this is possible importing an external line 2).
Line 9 – Saving the project in the project folder.
Line 13 to 17 – Instantiating of a modal template and creation of a System.
Engineering Data
Line 21 – Getting the container
Line 22 – Importing a standard material from Lib.

Geometry
Line 28 – Getting the container
Line 29-30 – Running a SPCM script.
Line 31-32 – Exit from SPCM and refresh the geometry

Model, Setup, Solution and Results
Line 36 – Getting the container
Line 39-40-41 – Running a Mechanical script.
Line 42-43 – Exit from Mechanical and refresh the model