Introduction
According to the Jupyter website, "JupyterLab is the latest web-based interactive development environment for notebooks, code, and data. Its flexible interface allows users to configure and arrange workflows in data science, scientific computing, computational journalism, and machine learning. A modular design invites extensions to expand and enrich functionality."
Jupyter notebooks are a common Python instruction tool. They are used extensively in teaching because of their simplicity and versatility. JupyterLab is an interactive development environment (IDE). This quick start shows how to use Jupyter notebooks in JupyterLab.
Within Ansys, employees have access to Ansys Lab, which is a remote server running JupyterLab. All common PyAnsys libraries and other useful libraries, such as Matplotlib and NumPy, are pre-installed on Ansys Lab. This quick start is as applicable to Ansys Lab users as JupyerLab users.
If you are reading this as part of an Ansys Codefest, you should jump to the "Codefest" section in the article!
Prerequisites
You should read the Jupyter/IPython Notebook Quick Start Guide and view the Jupyter content in the Ansys Introduction to Python Scripting video.
- You must have Python installed.
- You must have the `jupyter` Python library installed. (For more information, see Installing Packages in the Python Packing User Guide.)
- You must have JupyterLab installed. (Installing JupyterLab automatically installs the `jupyter` Python library.)
Start JupyterLab
Once prerequisites are met, you can start JupyterLab:
- Navigate to the directory that you want to work in.
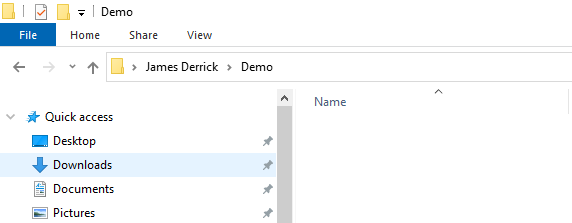
- Run the command `jupyter lab` in the address bar as shown in the following figure. Alternatively, from the same directory, you can run the command from a command line, powershell, or terminal.
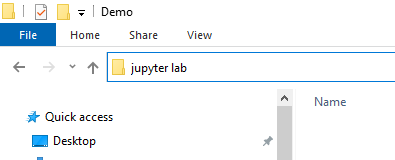
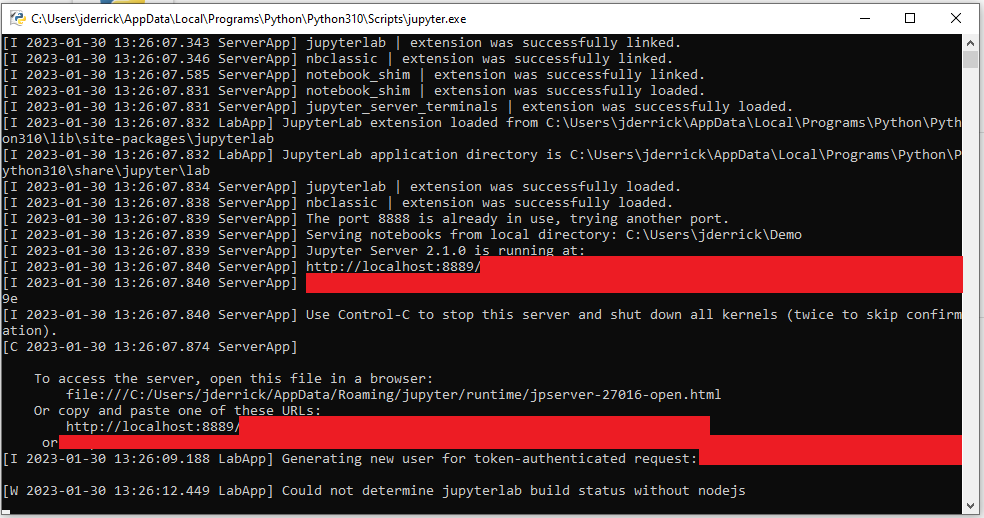
After you press Enter, a terminal opens and runs some code before opening a new tab in your default browser.
Note: The tab in your browser is your JupyterLab environment. As long as this tab is open, JupyterLab is running.
Codefests
If you are participating in an Ansys Codefest then you should start reading from this point! When you first login to your lab session you will see two tabs. You should select the "Launcher" tab and click the "Start Codefest". The necessary notebook will be created, and opened, for you.
You should read the rest of the article as normal from here.
Create or open a Jupyter notebook
A Jupyter notebook has an IPYNB extension. Here is how you create a notebook:
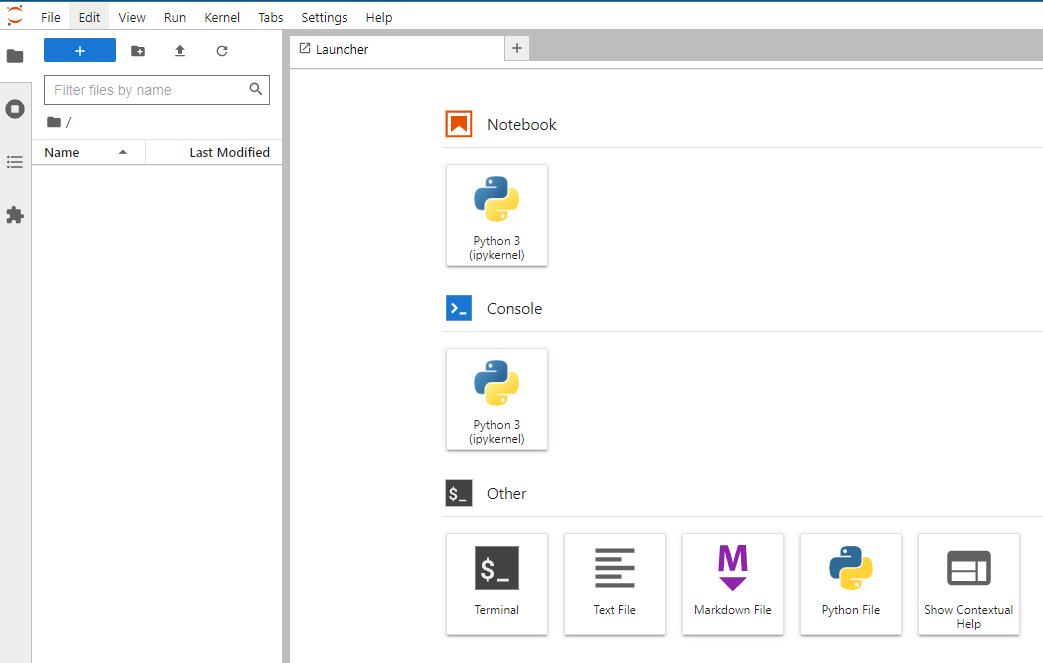
- To create a notebook, in your working directory under the Notebook heading, click Python 3 (ipykernel).
- To open an existing notebook, double-click any that appear in the left pane.
The following image shows a zoomed in view of the page that appears.
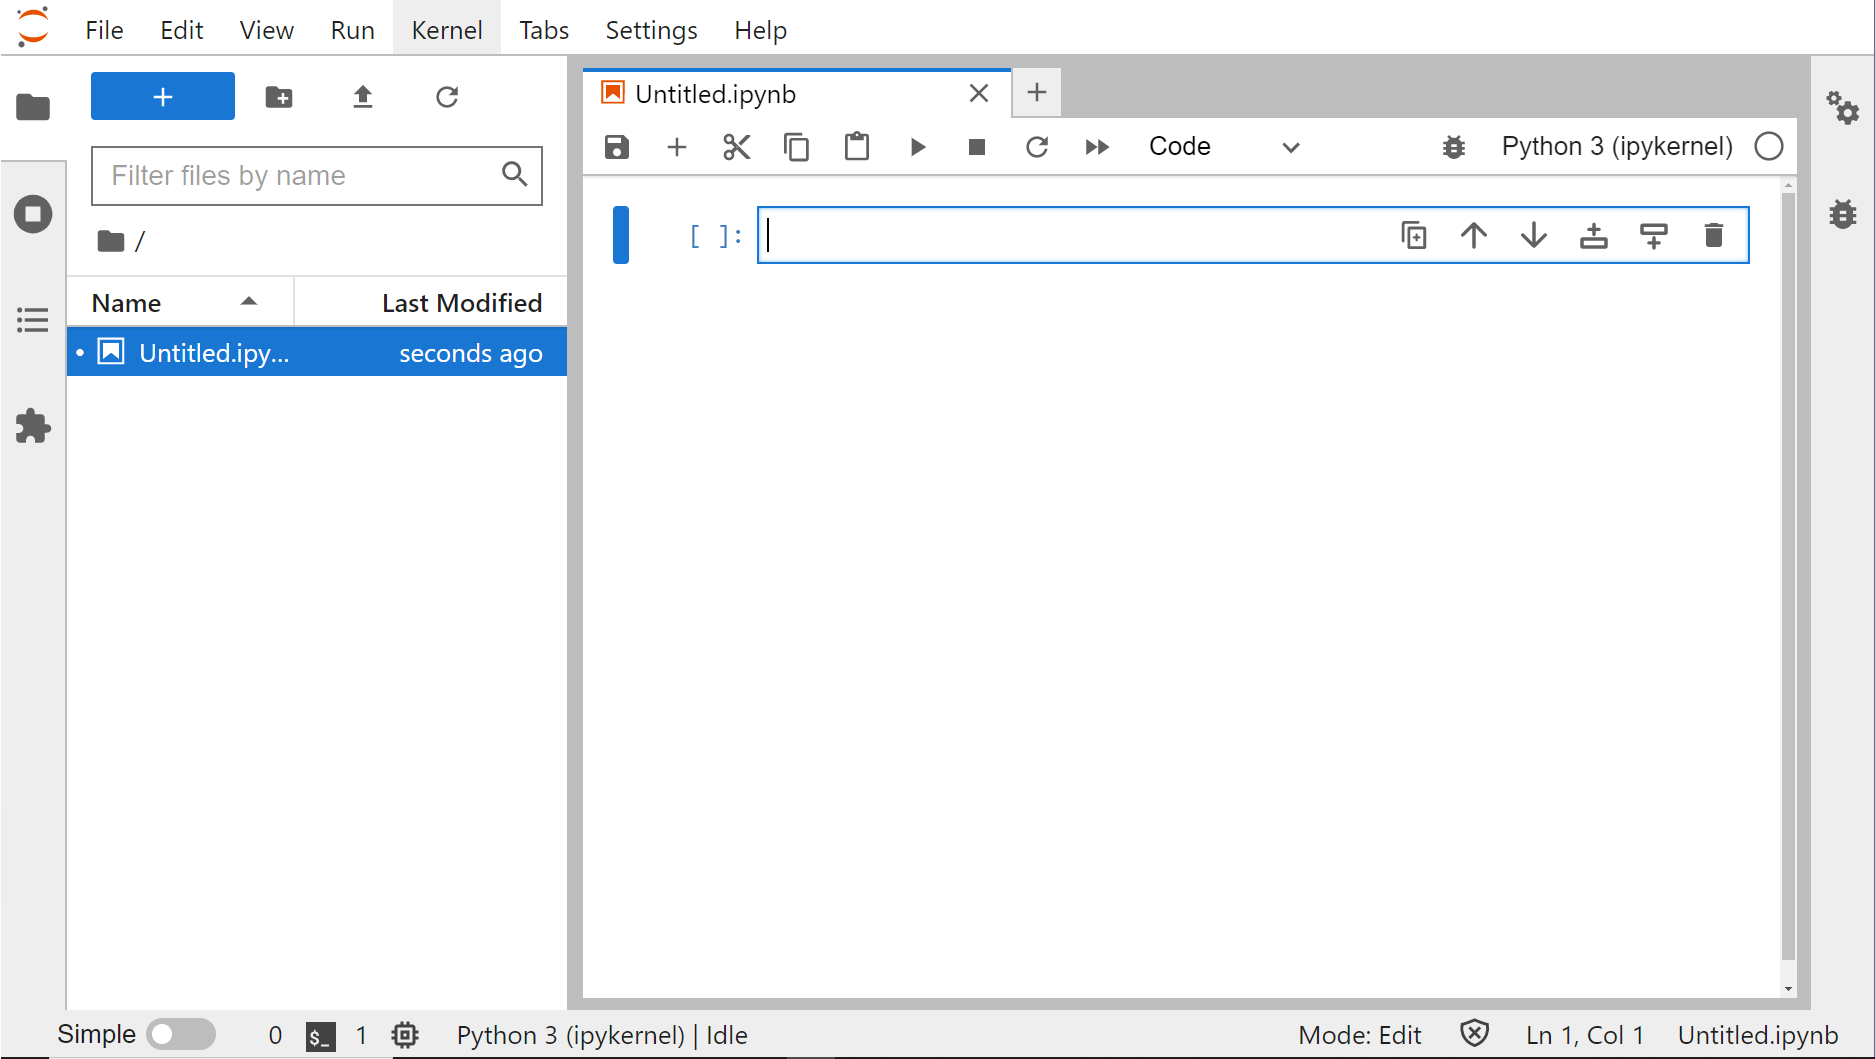
JupyterLab is straightforward to use. You can place your mouse cursor over buttons to see tooltips.
The kernel is the current Python environment that is running. If you create an infinite loop accidentally, you can kill the kernel to kill the infinite Python process.
This image highlights the main features.
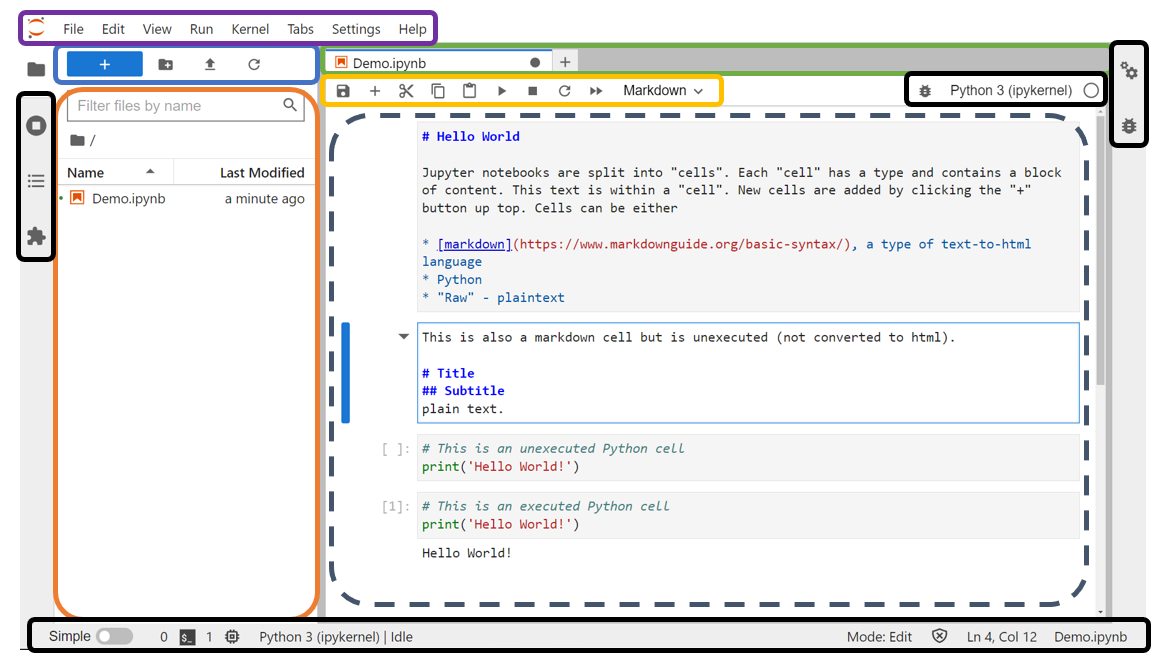
Here are descriptions for each box highlighting a feature:
- Dashed gray box: Area containing your notebook content.
- Black box: Advanced options that you don't need to worry about for now.
- Purple box: Menu options. You can click Help to access the documentation.
- Orange box: File explorer, which starts in the directory where you started JupyterLab. You cannot use the file explorer to navigate to directories higher than the starting directory.
- Blue box: Buttons for managing notebooks and files. The buttons from left to right perform these actions:
- Add a new file or notebook.
- Add a new directory.
- Upload a file.
- Refresh the file explorer,
- Green box: Shows tabs for each open notebook. You can have multiple notebooks open at a time.
- Yellow box: Main notebook commands. The buttons from left to right perform these operations on the active notebook:
- Save the notebook.
- Add a new cell.
- Cut selected cells.
- Copy selected cells.
- Paste copied cells.
- Run selected cells.
- Stop the kernel.
- Restart the kernel.
- Restart the kernel and run all cells in order.
- Select a cell from a dropdown list.
Notes on working with Jupyter Notebooks
- You can perform standard file operations within the file explorer by right-clicking. If you are using Ansys Lab, you can right-click and select an option for downloading files.
- Every statement in Python returns something, although often this is `None`. For more information, see Null in Python: Understanding Python's NoneType Object.
- The last statement that appears in a cell prints the object returned when the cell was run.
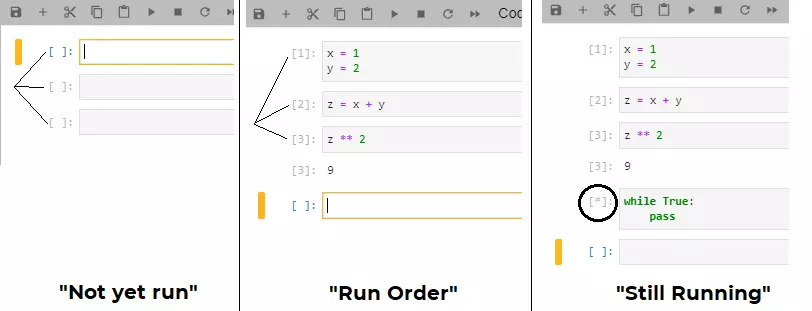
- Normally, Jupyter remembers which cells you have run and in what order.
- The square brackets to the left of every cell indicates the order that cell was run as well as its status
- [2] means "this cell was run second after the 1st cell"
- [*] means "this cell is currently running"
- [ ] means "this cell has not been run yet"
- However, if your kernel crashes or you have to restart for whatever reason, it forgets and all cells go back to [ ].
- You will need to re-run all the necessary cells up to your current cell, in the correct order, to recreate your previous behavior.
EXTRA: OnScale & Ansys Notebook
Ansys has a new tool in development, in conjunction with the OnScale platform, "Ansys Notebook". This is a Jupyter-like Python environment that operates very similarly to JupyterLab and Jupyter Notebook but with some key differences. An example notebook can be seen below.
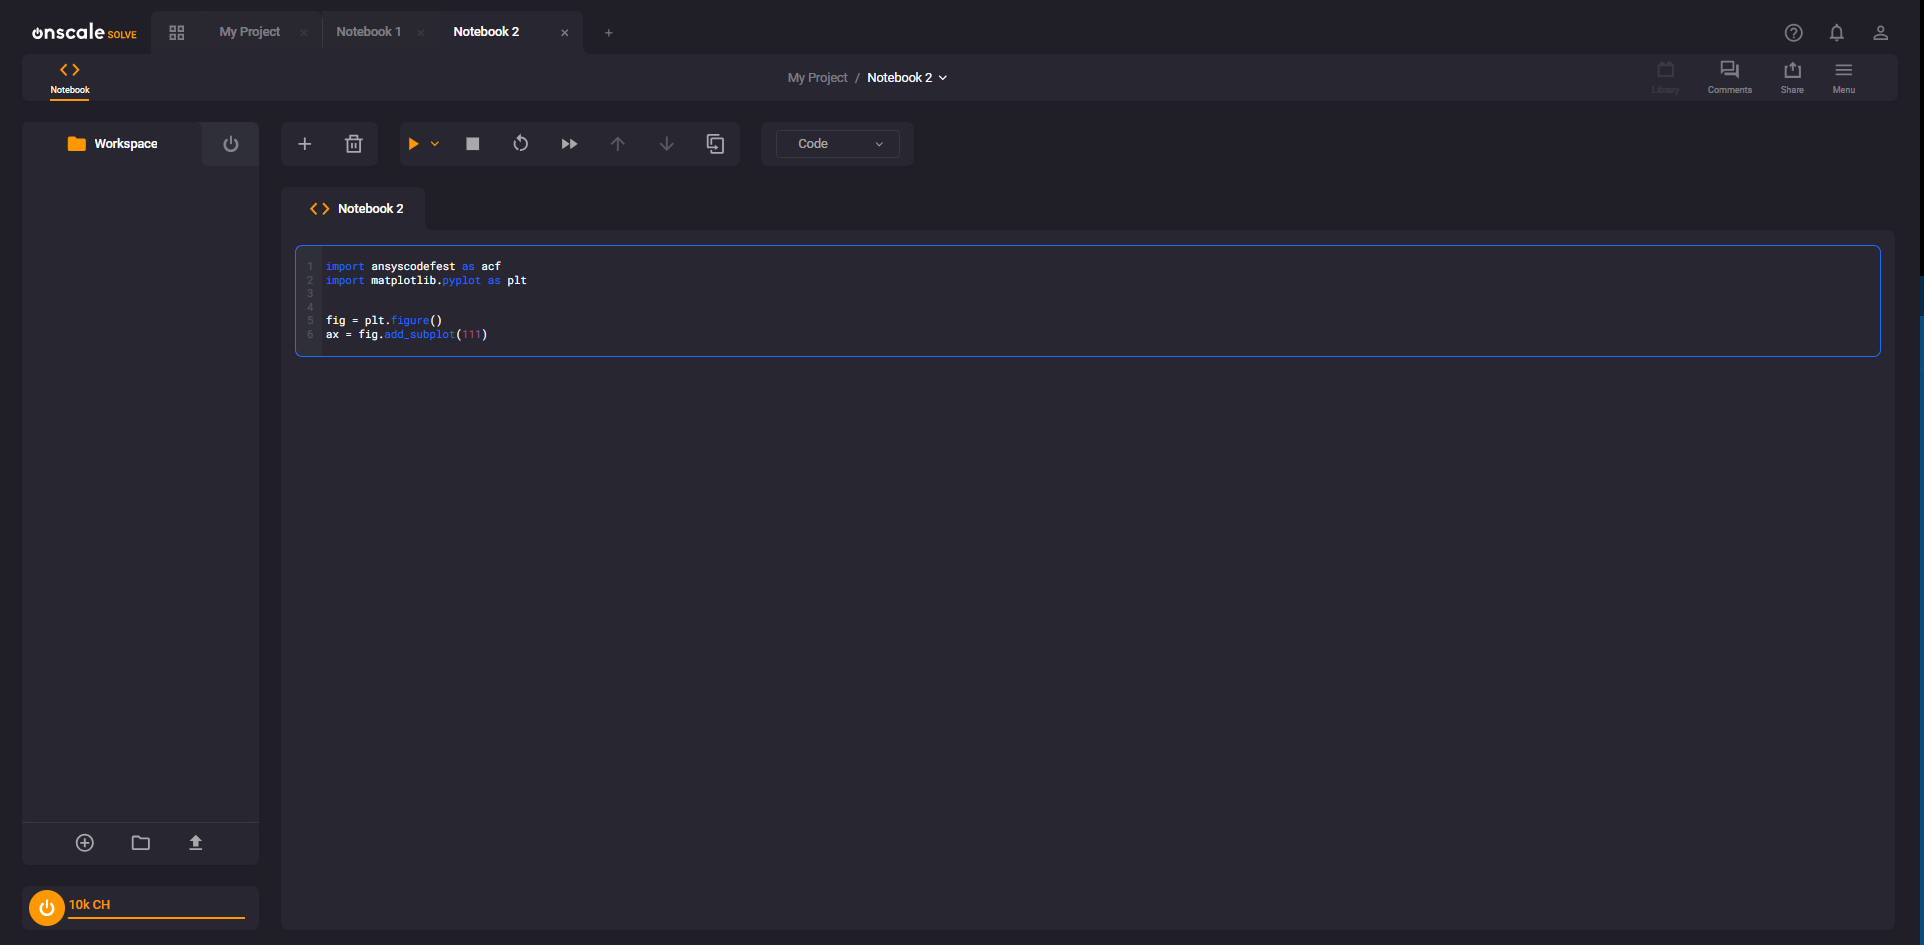
The layout is very similar! If you have read and understood how to use JupyterLab in this article so far then you should have no problem getting started with Ansys Notebook, and most of the features you're used to are still available here. However, there are some key differences to be aware of.
Ansys Notebooks are not files!
Unlike Jupyter, there is no equivalent to the `.ipynb` file. Notebooks are created dynamically in the UI. You can still work with files in a similar way (uploaded, or otherwise created, files appear in the Workspace on the left as they would in JupyterLab) but not the notebook file itself.
The "Cell is running" icon is on the right hand side of the cell
The usual "cell running" icon is to the left of the cell in JupyterLab but in Ansys Notebook it appears as a loading icon in the upper-right corner of the cell.
There are a variety of themes available
Besides the standard "light" and "dark" options there are some color options available as well! My setup in the screenshot is using a Dark/Orange theme.
Notebooks are associated with Projects
Notebook is not the only feature of the OnScale platform and you can have multiple "Projects" in your environment. Each project has its own set of Notebooks as well as other features as well.